Tensorflow深度学习与应用笔记《1》Day8
发布于2021-07-25 07:36 阅读(1261) 评论(0) 点赞(1) 收藏(4)
首先简单介绍一下Tensorflow ,它是谷歌第二代人工学习系统,支持python和C++,底层是用C++写的,使用的时候是python,是一个深度学习平台。
目录
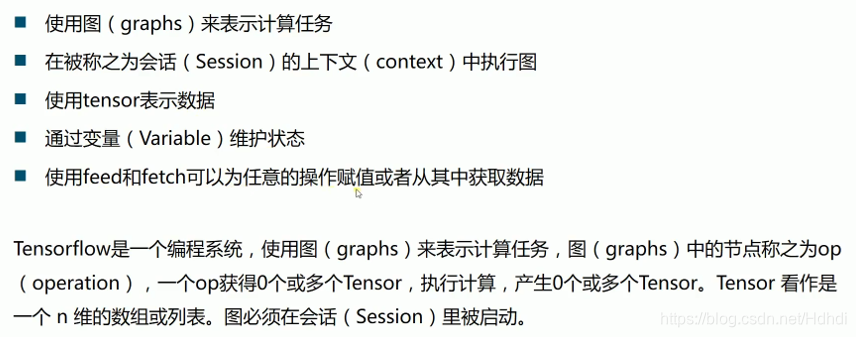
1-1.Tensorflow基本概念

1-2.Tensorflow结构

2-1.创建图,启动图
import tensorflow as tf- #创建一个常量op
- m1 = tf.constant([[3,3]])
- #创建一个常量op
- m2 = tf.constant([[2],[3]])
- #创建一个矩阵乘法op,把m1和m2传入
- product = tf.matmul(m1,m2)
- print(product)
-
输出:![]()
- #定义一个会话,启动默认图
- sess = tf.Session()
- #调用sess的run方法来执行矩阵乘法op
- #run(product)触发了图中3个op
- result = sess.run(product)
- print(result)
- sess.close()
- with tf.Session()
- #调用sess的run方法来执行矩阵乘法op
- #run(product)触发了图中3个op
- result = sess.run(product)
- print(result)
输出 :![]()
2-2.Tensorflow中的变量
import tensorflow as tf- x = tf.Variable([1,2])
- a = tf.constant([3,3])
- # 增加一个减法op
- sub = tf.subtract(x,a)
- # 增加一个加法op
- add = tf.add(a,sub)
-
- # 全局变量初始化
- init = tf.global_variables_initializer()
- with tf.Session() as sess:
- sess.run(init)
- print(x.value)
- print(sess.run(sub))
- print(sess.run(add))
输出:

- # 创建一个变量,初始化为0
- state = tf.Variable(0, name='counter')
- # 创建一个op
- new_value = tf.add(state,1)
- # 赋值op
- update = tf.assign(state,new_value)
- # 初始化全局变量
- init = tf.global_variables_initializer()
-
- # 变量初始化为0,循环更新并打印
- with tf.Session() as sess:
- sess.run(init)
- print(sess.run(state))
- for _ in range(5):
- sess.run(update)
- print(sess.run(state))
输出:

注意:![]()
原因是尝试使用没有初始化的变量,解决方法:执行初始化操作:
init = tf.global_variables_initializer() 是全局变量的初始化
2-3.Tensorflow中的Fetch和Feed
Fetch可以在会话里执行多个op,得到结果
import tensorflow as tf- input1 = tf.constant(3.0)
- input2 = tf.constant(2.0)
- input3 = tf.constant(5.0)
-
- add = tf.add(input2,input3)
- mul = tf.multiply(input1,add)
-
- with tf.Session() as sess:
- result = sess.run([mul, add])
- print((result))
输出:![]()
feed可以每次给图传入不同的数据
- # 创建占位符
- input1 = tf.placeholder(tf.float32)
- input2 = tf.placeholder(tf.float32)
- output = tf.multiply(input1, input2)
-
- with tf.Session() as sess:
- # feed数据以字典形式传入
- print(sess.run(output, feed_dict={input1:[2.0],input2:[6.0]}))
输出:![]()
2-4.Tensorflow简单示例
- import tensorflow as tf
- import numpy as np
- # 生成随机点
- x_data = np.random.rand(100)
- y_data = x_data*0.1 + 0.2
-
- # 构建线性模型
- b = tf.Variable(0.)
- k = tf.Variable(0.)
- y = k*x_data + b
-
- # 定义损失函数
- loss = tf.reduce_mean(tf.square(y_data-y))
- # 定义一个梯度下降法进行训练的优化器,学习率是0.2
- optimizer = tf.train.GradientDescentOptimizer(0.2)
- # 最小化代价函数
- train = optimizer.minimize(loss)
-
- # 变量初始化
- init = tf.global_variables_initializer()
-
- with tf.Session() as sess:
- sess.run(init)
- for step in range(201):
- sess.run(train)
- if step%20 == 0:
- print(step+1, sess.run([k,b]))
输出:

3-1.非线性回归示例
- import tensorflow as tf
- import numpy as np
- import matplotlib.pyplot as plt
训练数据
- # 生成200个随机点,并改变其形状为200*1
- x_data = np.linspace(-0.5, 0.5, 200)[:,np.newaxis]
- noise = np.random.normal(0,0.02,x_data.shape)
- y_data = np.square(x_data) + noise
-
- #查看一下数据形状
- print(x_data.shape)
- type(x_data)
- print(noise.shape)
输出:
构建一个神经网络,用来计算给定x的值,预测y的值
- # 定义两个placeholder
- x = tf.placeholder(tf.float32, [None,1])
- y = tf.placeholder(tf.float32, [None,1])
-
- # 定义中间层
- Weights_L1 = tf.Variable(tf.random_normal([1,10]))
- bias_L1 = tf.Variable(tf.zeros([1,10]))
- Wx_plus_b_L1 = tf.matmul(x, Weights_L1) + bias_L1
- # 激活函数
- L1 = tf.nn.tanh(Wx_plus_b_L1)
-
- # 定义输出层
- Weights_L2 = tf.Variable(tf.random_normal([10,1]))
- bias_L2 = tf.Variable(tf.zeros([1,1]))
- Wx_plus_b_L2 = tf.matmul(L1,Weights_L2) + bias_L2
- prediction = tf.nn.tanh(Wx_plus_b_L2)
-
- # 二次代价函数(损失函数)
- loss = tf.reduce_mean(tf.square(y-prediction))
- # 梯度下降法
- train_step = tf.train.GradientDescentOptimizer(0.1).minimize(loss)
-
- with tf.Session() as sess:
- # 变量的初始化
- sess.run(tf.global_variables_initializer())
- for _ in range(2000):
- sess.run(train_step, feed_dict={x:x_data, y:y_data})
-
- # 获得预测值
- prediction_value = sess.run(prediction,feed_dict={x:x_data})
-
- plt.figure()
- plt.scatter(x_data, y_data)
- plt.plot(x_data, prediction_value,'r-', lw=5)
- plt.show()
输出:

3-2.MNIST数据集分类简单版本
MNIST数据集


Softmax函数

MNIST数据集简单版本
- import tensorflow as tf
- from tensorflow.examples.tutorials.mnist import input_data
- # 载入数据
- mnist = input_data.read_data_sets('MNIST_data', one_hot=True)
- # 批次的大小
- batch_size = 128
- n_batch = mnist.train.num_examples // batch_size
-
- x = tf.placeholder(tf.float32, [None,784])
- y = tf.placeholder(tf.float32, [None, 10])
-
- # 创建一个简单的神经网络
- W = tf.Variable(tf.zeros([784,10]))
- b = tf.Variable(tf.zeros([1, 10]))
- prediction = tf.nn.softmax(tf.matmul(x,W) + b)
-
- # 代价函数
- loss = tf.reduce_mean(tf.square(y-prediction))
-
- # 梯度下降法
- train_step = tf.train.GradientDescentOptimizer(0.2).minimize(loss)
-
- # 初始化变量
- init = tf.global_variables_initializer()
-
- # 得到一个布尔型列表,存放结果是否正确
- correct_prediction = tf.equal(tf.argmax(y,1), tf.argmax(prediction,1)) #argmax 返回一维张量中最大值索引
-
- # 求准确率
- accuracy = tf.reduce_mean(tf.cast(correct_prediction,tf.float32)) # 把布尔值转换为浮点型求平均数
-
- with tf.Session() as sess:
- sess.run(init)
- for epoch in range(21):
- for batch in range(n_batch):
- # 获得批次数据
- batch_xs, batch_ys = mnist.train.next_batch(batch_size)
- sess.run(train_step, feed_dict={x:batch_xs, y:batch_ys})
- acc = sess.run(accuracy, feed_dict={x:mnist.test.images,y:mnist.test.labels})
- print("Iter " + str(epoch) + " Testing Accuracy: " + str(acc))
输出:

优化代码
- 三层网络,添加激活层、drop层,使用交叉熵计算loss
- # 批次的大小
- batch_size = 128
- n_batch = mnist.train.num_examples // batch_size
-
- x = tf.placeholder(tf.float32, [None,784])
- y = tf.placeholder(tf.float32, [None, 10])
- keep_prob = tf.placeholder(tf.float32)
-
- # 创建神经网络
- W1 = tf.Variable(tf.truncated_normal([784,2000],stddev=0.1))
- b1 = tf.Variable(tf.zeros([1, 2000]))
- # 激活层
- layer1 = tf.nn.relu(tf.matmul(x,W1) + b1)
- # drop层
- layer1 = tf.nn.dropout(layer1,keep_prob=keep_prob)
-
- # 第二层
- W2 = tf.Variable(tf.truncated_normal([2000,500],stddev=0.1))
- b2 = tf.Variable(tf.zeros([1, 500]))
- layer2 = tf.nn.relu(tf.matmul(layer1,W2) + b2)
- layer2 = tf.nn.dropout(layer2,keep_prob=keep_prob)
-
- # 第三层
- W3 = tf.Variable(tf.truncated_normal([500,10],stddev=0.1))
- b3 = tf.Variable(tf.zeros([1,10]))
- prediction = tf.nn.sigmoid(tf.matmul(layer2,W3) + b3)
-
- loss = tf.reduce_mean(tf.nn.softmax_cross_entropy_with_logits(labels=y, logits=prediction))
-
- # 梯度下降法
- train_step = tf.train.GradientDescentOptimizer(0.2).minimize(loss)
-
- # 初始化变量
- init = tf.global_variables_initializer()
-
- # 计算准确率
- prediction_2 = tf.nn.softmax(prediction)
- # 得到一个布尔型列表,存放结果是否正确
- correct_prediction = tf.equal(tf.argmax(y,1), tf.argmax(prediction_2,1)) #argmax 返回一维张量中最大值索引
-
- # 求准确率
- accuracy = tf.reduce_mean(tf.cast(correct_prediction,tf.float32)) # 把布尔值转换为浮点型求平均数
-
- with tf.Session() as sess:
- sess.run(init)
- for epoch in range(60):
- for batch in range(n_batch):
- # 获得批次数据
- batch_xs, batch_ys = mnist.train.next_batch(batch_size)
- sess.run(train_step, feed_dict={x:batch_xs, y:batch_ys, keep_prob:0.8})
- acc = sess.run(accuracy, feed_dict={x:mnist.test.images,y:mnist.test.labels,keep_prob:1.0} )
- print("Iter " + str(epoch) + " Testing Accuracy: " + str(acc))
输出:

⭐⭐⭐持续更新.....
⭐⭐⭐每天提醒自己,自己就是个菜鸡!
⭐⭐⭐已经看到最后啦,如果对您有帮助留下的每一个点赞、收藏、关注是对菜鸡创作的最大鼓励❀
⭐⭐⭐有相关问题可以写在评论区,一起学习,一起进步
原文链接:https://blog.csdn.net/Hdhdi/article/details/119042199
所属网站分类: 技术文章 > 博客
作者:小酷狗
链接:http://www.pythonpdf.com/blog/article/505/7069c65083b56842b460/
来源:编程知识网
任何形式的转载都请注明出处,如有侵权 一经发现 必将追究其法律责任
昵称:
评论内容:(最多支持255个字符)